Introduction
Do you hate interacting with your database system such as MariaDB from its prompt? If yes, then phpMyAdmin is designed with you in Mind. PhpMyAdmin is a robust application that allows you to manage and interact with your database management system via an intuitive web interface. This tutorial will show you how to install and configure phpMyAdmin on your Debian 9 VPS or dedicated server.
Before you begin
For this process to flow flawlessly you require the following:
- A fully configured Debian 9 server
- LAMP stack installed on the Debian 9 server
- MariaDB installed and configured
- A domain name configured with the SSL certificate
If all the above conditions are met, let’s get started!
Step1 – Deploying PhpMyAdmin
The default Debian system repositories avail the phpMyAdmin package. To install the phpMyAdmin tool from these repositories, first, issue the command below to update the package index:
$ sudo apt update
Then, execute the command below to install phpMyAdmin and its required files:
$ sudo apt install phpmyadmin php-mbstring php-gettext
You will be required to answer some questions to configure the installation correctly. Once question prompt appears, press the space bar to select “apache2†the hit ENTER to allow the process to continue.
Note: If you fail to select apache2, the installer will not be able to transfer the required files during the installation.
Besides, you will get another prompt asking you whether to utilize the dbconfig-common to configure your database. Select YES and hit ENTER to continue. 
$ sudo phpenmod mbstring
Now, issue the command below to restart Apache and implement the changes.
$ sudo systemctl restart apache2
By now, the phpMyAdmin is installed and set up for first use. However, before any of your MariaDB user can use this application, you need to adjust their privileges and authentication.
Step 2 – Modifying Database User’s Privileges And Authentication
Once PhpMyAdmin is installed on Debian 9, it automatically creates a new user, phpmyadmin. This database user carries out some underlying process for this application. It is wise if you use a different account to log in instead of logging in as phpmyadmin with the password set when configuring phpMyAdmin. By default, the root database user authenticates via the unix_socket in a Debian system. This renders impressive usability and security but it also makes things intricate especially when you want to allow phpMyAdmin admin rights via the root database user. Instead of changing the authentication details of your root account, create a new MariaDB user and access the phpMyAdmin using it. To create the new user, issue the command below to log in to the MariaDB shell:
$ sudo mariadb
Use the command above if you have not enabled password authentication. On the other hand, if you have configured password authentication use the command below:
$ sudo mariadb -u user -p
Once you access the MariaDB command line, execute the command below to create the user and set the password: MariaDB [(none)]>
CREATEUSER'hostuser'@'localhost'IDENTIFIEDBY'password';
Note: Remeber to replace the placeholder ‘hostuser’ with your preferred username, and ‘password’ with a string password.
Next, run the command below to assign the appropriate privileges to the new user: MariaDB [(none)]>
GRANT ALL PRIVILEGESON *.* TO'hostuser'@'localhost'WITHGRANTOPTION;
Finally, run the command below to exit the mariadB shell. MariaDB [(none)]>
exit
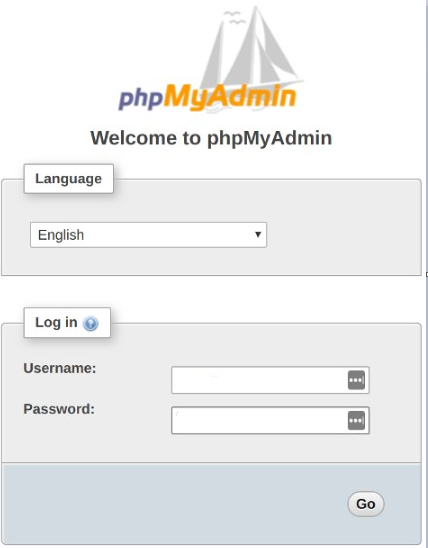
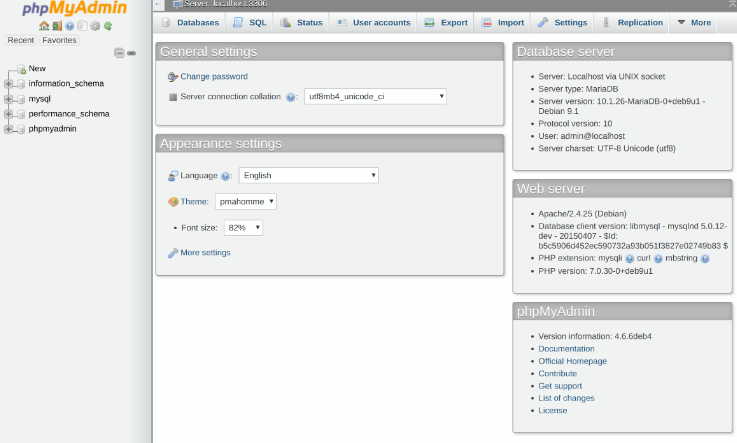
Now, search https://your_domain_or_IP/phpmyadmin using your favorite web browser. This will take to the login interface, as shown below: 

Step 3 – Securing The PhpMyAdmin
Since phpMyAdmin is ubiquitous, it’s an easy target for hackers. For this reason, you should implement stringent security measures to bar unauthorized users from accessing the program. We’ll Apache’s .htaccess to enhance the authorization and authentication functionalities of phpMyAdmin. To do so, first, run the command below to open the configuration file:
$ sudo nano /etc/apache2/conf-available/phpmyadmin.conf
Once the file opens, locate the <Directory /usr/share/phpmyadmin> section and add the directive AllowOverride All, as shown below:
<Directory /usr/share/phpmyadmin>
    Options FollowSymLinks
    DirectoryIndex index.php
    AllowOverride All
    . . .
Save the file and exit the nano editor. Next, restart Apache to enable the changes:
$ sudo systemctl restart apache2
That’s it! You have activated the use of .htaccess for your phpMyAdmin. Now, you should create a new .htaccess file to implement robust security. Execute the command below to create a .htaccess file, and then open it with your root privileges:
$ sudo nano /usr/share/phpmyadmin/.htaccess
Copy and paste the content below to this file:
AuthType Basic
AuthName "Restricted Files"
AuthUserFile /etc/phpmyadmin/.htpasswd
Require valid-user
Save the file and close the nano editor. Remember, you selected /etc/phpmyadmin/.htpasswd as the location for the password file. Now, create and pass this directory to a first user:
$ sudo htpasswd -c /etc/phpmyadmin/.htpasswd username
Choose and confirm the password for your initial user. The file will be created with a hashed password you selected. To create another user, execute the command below:
$ sudo htpasswd /etc/phpmyadmin/.htpasswd additionaluser
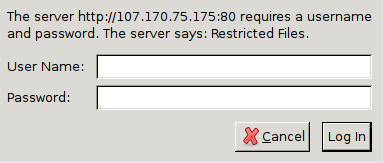
Search https://domain_name_or_IP/phpmyadmin using your favorite browser. You should access the subdirectory of your phpMyAdmin application: 
Conclusion
That’s it! You have successfully installed phpMyAdmin on your Debian 9 VPS or Dedicated server. You can now use the interface to manage and administer your database with ease.
Check out these top 3 Best web hosting services
- Want info about best web hosting? Clicking this link can be of great help.


