Blazor is a web framework for simplifying the development of fast single page applications, which can run in any browser. It is based on C#, Razor, and HTML.
In this article, you will learn to deploy an ASP.NET Core hosted application created with the web UI framework on IIS. You will use Visual Studio 2017 on your Windows 10 PC to publish it. You will also use SQL Server 2014 to deal with DB operations. But before discussing the steps for deployment, let’s take a look at the prerequisites.
Prerequisites
Also, take a look at this article, which shows the process of creating Cascading DropDownList in Blazor using Entity framework. You will have to take it as a reference for developing the application that will be deployed in this tutorial.
Steps for Installing .NET Core Hosting Bundle
First, you need to install .NET Core Hosting Bundle. Follow these steps:
- Head to the .NET Core Hosting Bundle
- Choose the latest non-preview .NET Core runtime.
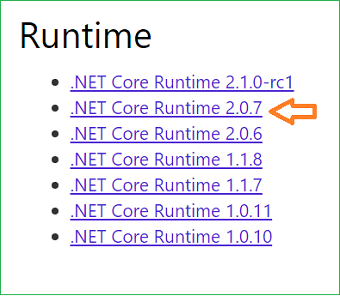
- Click on Hosting Bundle Installer. The .NET Core Hosting Bundle will begin to be downloaded.
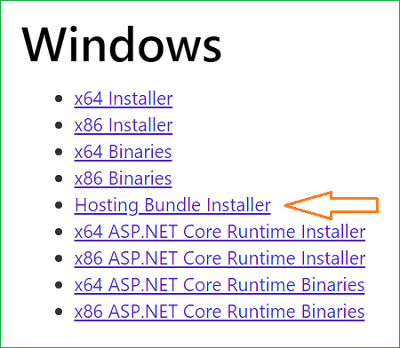
- Double click on the downloaded file to start the installation process.
When the installation is done, restart your PC.
Steps for Publishing the Blazor Application
Now, it’s time for publishing your Blazor application. Here are the steps:
- Open Visual Studio 2017.
- Open the Blazor application.
- Take a look at the Solution Explorer tab, which is located on the left side of the screen. Right-click on Server project of the solution, which is BlazorDDL.Server. Click on Publish.
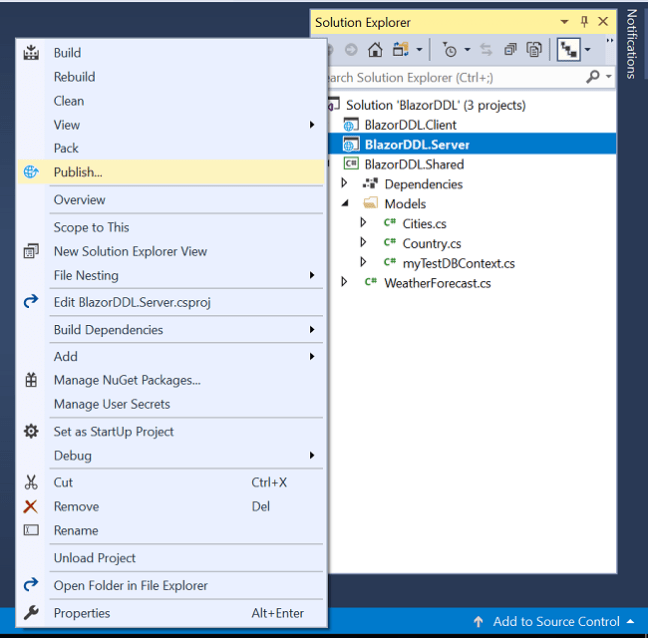
- You will see a new screen. In the left menu, click on Folder. Choose the folder where you want your Blazor application to be published to.
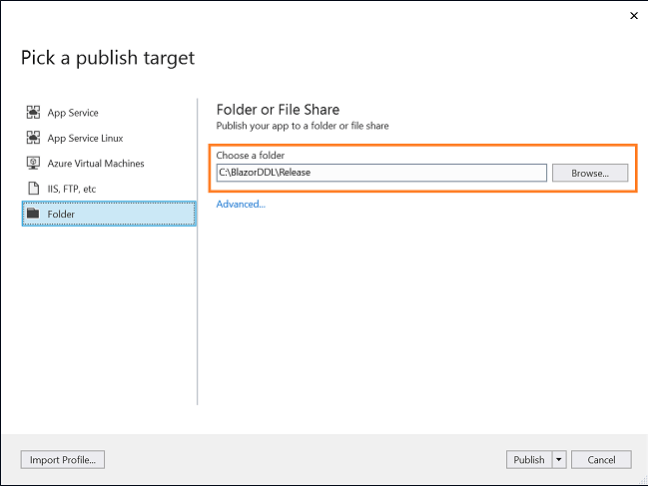
- Click on Publish. If there is no error, your application will be published successfully.
Steps for Configuring IIS
Next, you will have to configure IIS. Follow these steps:
- Open IIS
- Right click on Sites. Then click on Add Website
- A pop-up box will appear. Enter your Site name. In this tutorial, we will use ankitsite. Insert the path to the published application in the box below Physical path. Then insert your Hostname. Here, we will use ankitsite.com
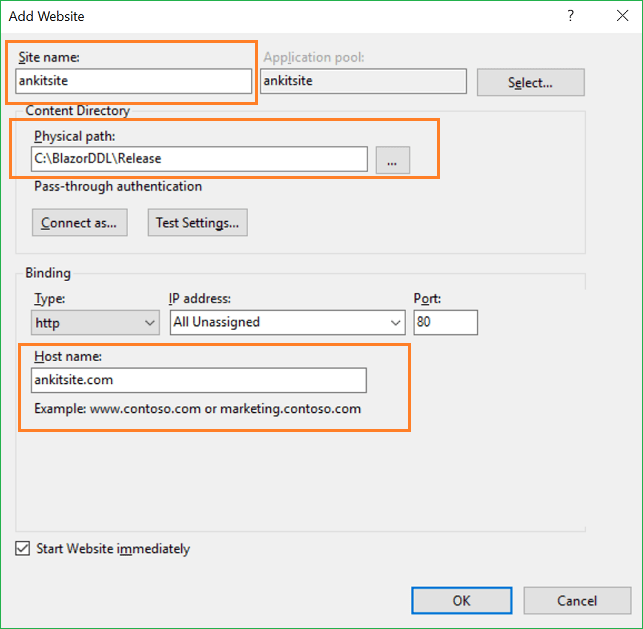
- Click OK.
- Now, you have to configure Application Pool. You will find it the left panel. Double click on the pool ankisite, which is the same as the Site name you entered in the 3rd step.
- The Edit Application Pool window will appear. From the .NET CLR Version drop-down list, choose No Managed Code option.
- Click OK.
Steps for Configuring the DNS Host
The process of configuring the DNS Host is really easy. You just need to follow these steps:
- Head to this path on your PC:
C:WindowsSystem32driversetc
- Open the hosts file with your favorite text editor.
- Add the hostname, which you entered in the 3rd step of Configuring IIS section, against the local IP address.
Steps for Executing Demo
Finally, it’s time for executing your Blazor application on localhost. Here are the steps:
- Open your favorite browser.
- Enter the configured hostname in the address bar.
- Hit the Enter button. Your Blazor application will appear.
Conclusion
In this article, you have learned to publish your Blazor application. You have also learned to configure IIS and DNS host appropriately.
Check out these top 3 Windows hosting services:
- Your search to the best windows hosting can end by clicking here.


