What Do I Need?
- Raspberry Pi 3
- OpenCV
- Python
What is OpenCV on a Raspberry Pi 3?
Simply, freaking awesome! When you combine OpenCV with a Raspberry Pi 3 you have a super powerful micromachine capable of fulfilling a massive range of use cases. Imagine using a camera to track and identify your friends and family when they come to your front door or better yet, sound an alarm when you detect someone entering the perimeter of your castle so that you then deploy drones and countermeasures. Or how about a system that monitors the emotional wellbeing of your family members and provides update notifications to your mobile. There are literally no limits to what can be done. The limits are only your imagination.
- Setup Remote Access to your Raspberry Pi 3
- Personally I’d recommend remoting into your Pi from another computer device. It will make life infinitely easier, I promise you.
- Install Tight VNC Server:
sudo apt install tightvncserver
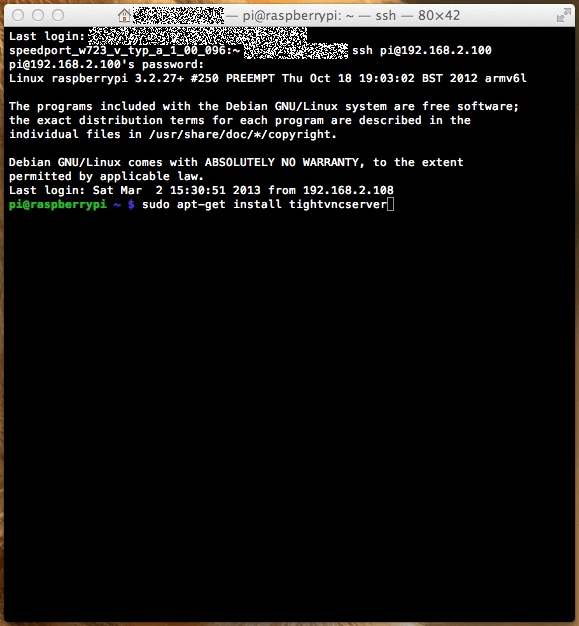
- Press ‘Y’ to continue the installation process.
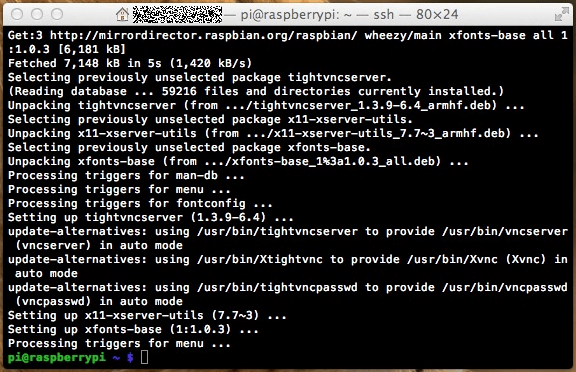
- Start your VNC Server by typing the following command into Terminal:
vncserver:1 -geometry 1280x800 depth 24
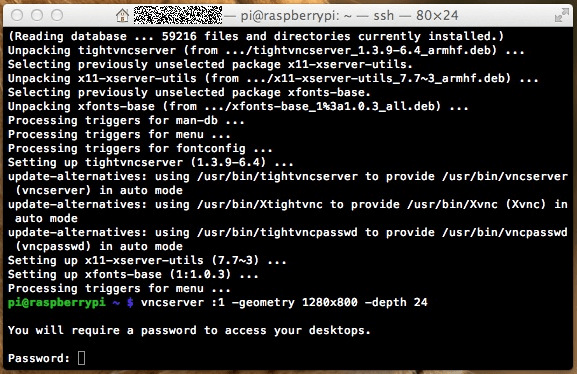
- You’ll be asked to set up a password. It’s imperative that you keep a record of it.
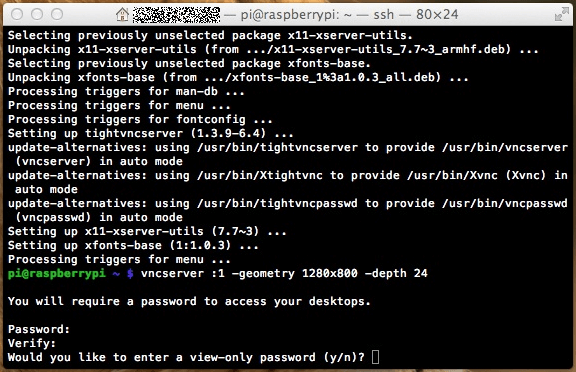
- You’ll be asked if you’d like to set a view-only password. Press ‘n’ to continue.
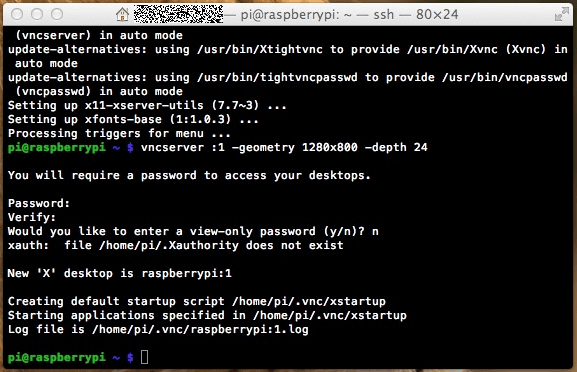
- On your Mac open your Finder and press CMD + K and then enter the following command:
vnc:// your-ip:590+ The number you got in the previous step. In my example:vnc://192.168.2.102:5901

- You’ll be asked for the password you set up in the previous step. Enter it and select Connect.

- Press ‘Y’ to continue the installation process.
- Install OpenCV on your Raspberry Pi 3
- Ensure your Raspberry Pi 3 is plugged into a mains power supply. This is necessary in order to ensure that you don’t lose power when OpenCV starts to spool up.
- Open Terminal and enter the following commands to get started:
sudo apt update
sudo apt install python3-opencv
sudo apt install libhdf5-dev
sudo apt install libhdf5-serial-dev
sudo apt install libatlas-base-dev
sudo apt install libjasper-dev
sudo apt install libqtgui4
sudo apt install libgt4-test
- That command will install all the necessary packages needed in order for OpenCV to run.
- To verify the installation, import the cv2 module and attempt to query the OpenCV version:
python3 -c "import cv2; print(cv2.__version__)"
Output
4.1.0
- If you need to install OpenCV with Python 2 compatibility or bindings install the python-opencv packages.
- If you encounter an error trying to ascertain the version, double check that you’ve used double underscores on either side of the version tag.
Conclusion
If you want some extra bang for your buck I’d recommend installing an awesome library of machine learning tools called Orange. Orange is a component-based data mining software. It includes an awe-inspiring range of data visualization, exploration, pre-processing and modeling techniques.
Clone the repo from the Orange Github Source:
git clone https://github.com/biolab/orange.git
To build and install Orange you can use the setup.py file in the root of the Orange directory, requiring gcc, python and numpy development headers. If you’ve followed the previous steps to install OpenCV you’ll already have all the required software packages now installed on your Raspberry Pi 3. To use it unpack nightly sources and run the following command:
python setup.py build
sudo python setup.py install
This will also install the orange-canvas script so that you can start Orange Canvas from the command line. In order to run Orange locally use the following command:
python setup.py install --user
Now go and have a load of fun. I mean it. Lots of fun while at the same time respecting the personal privacy and security of those around you.
- Looking for Top web hosting? Clicking on this link can be the solution.


